Semantic Versioning in Azure DevOps: Automating Version Management with semantic-release-ado
July 09, 2026

Introduction to ASP.NET Core Identity
ASP.NET has historically provided plumbing code to help identify and manage your application’s users. There are many options you can choose to manage your application’s users including Active Directory, external identity providers, or storing your user accounts in your application database (which typically involves managing the data store with Entity Framework and SQL Server). In this post we’ll take a look at storing your user accounts in the application database leveraging ASP.NET Core Identity. This option will let us take advantage of Microsoft’s helper methods for managing user accounts which includes handling login, logout, password reset, user registration, etc.
Project Setup
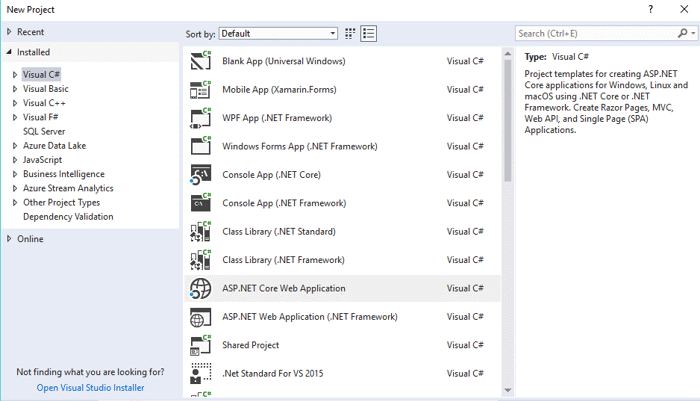
In Visual Studio 2017, select new project and pick ASP.NET Core Web Application.
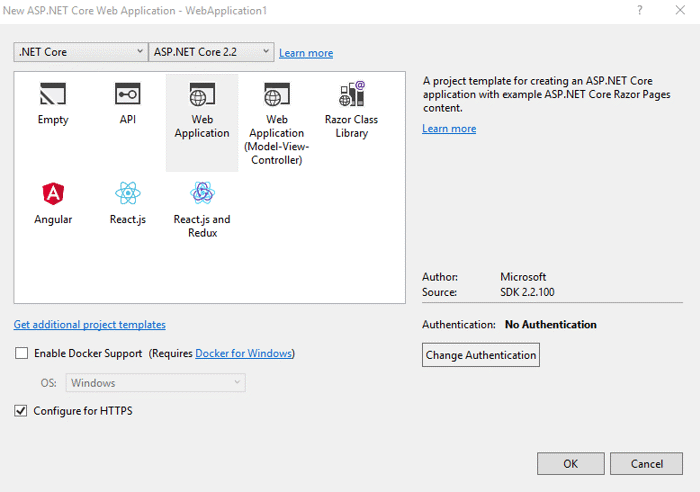
Next select Web Application. Note the default Authentication is No Authentication. Click on the Change Authentication button so we can choose one.
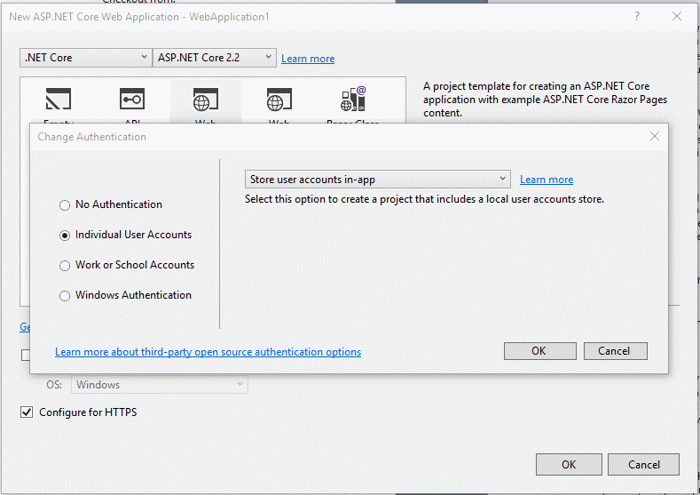
You have a lot of choices here but to leverage ASP.NET Core Identity, choose Individual User Accounts and the Store user accounts in-app option, then click OK and OK again. Visual Studio will create your project based on the template options you have selected.
Expand the Areas folder and you’ll see an Identity folder and a Pages folder under that. Note that the only physical file created is _ViewStart.cshtml, which is provided to customize the look of the Identity pages. You may be wondering where the controllers and views are that provide the user management functionality. That functionality has been put into a Razor Class Library which is provided as a NuGet package Microsoft.AspNetCore.Identity.UI.

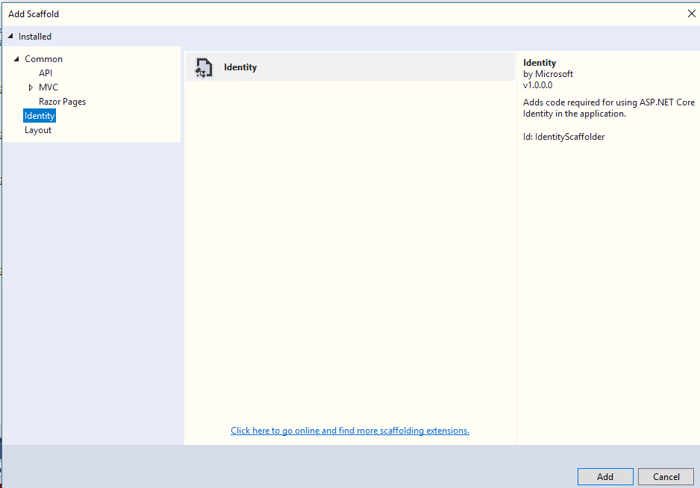
If you need to customize the user management pages beyond customizing the layout, you can get the pages created by adding them via scaffolding. In Visual Studio, right-click on the web application project, select Add, New Scaffold Item…, select Identity, then click Add.
You’ll see another window that lets you set the Identity options including specifying a custom layout page, choosing which user management pages to create, and selecting an Entity Framework Data Context. Click the Override all files checkbox and select the default Data context then click Add.

Visual Studio will scaffold all the identity files for you and also add a readme file that tells you how to implement them.
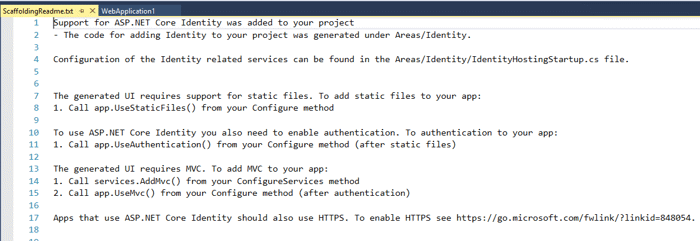
Even though the readme file indicates you need to make these changes, the scaffolding makes them for you.
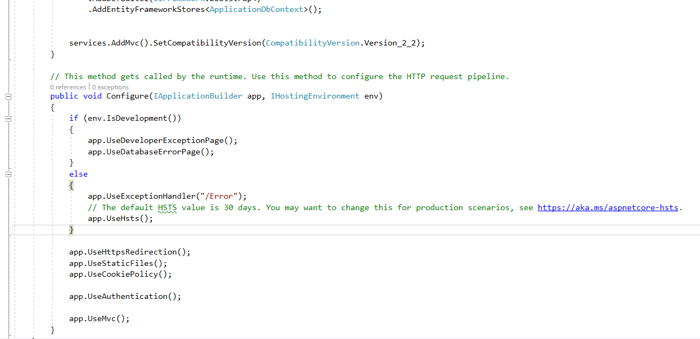
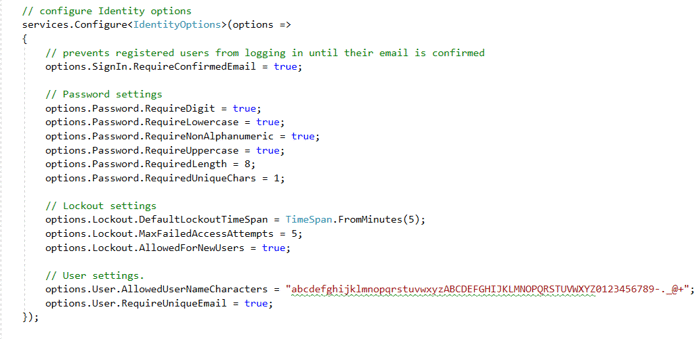
Identity has many configuration options for setting password and lockout requirements based on how you want to manage your users. You can choose to go with the defaults or specify the options in Startup.cs.
You should now see all the Identity pages created under Areas/Identity in your project. One thing to note is that the Identify files are created as Razor Pages even if you select the Web Application (Model-View-Controller) project template when creating the project. This seems liked a bug or an oversight on Microsoft’s part, but it turns out to be part of a push Microsoft is making away from MVC and towards Razor Pages. They have no plans to add an option to scaffold the Identity pages as MVC. In my opinion, this is a misstep since I am still using MVC, I don’t want a mix of MVC and Razor pages in my application, and I don’t want to take the time to learn Razor Pages. I did take some time to see if I could convert the Razor Pages to MVC but after wasting a couple hours, I gave up and have begrudgingly accepted the fact that the Identity piece of my application will have to be Razor Pages.

If you compile and run your application, you should be able to see the default page with Register and Login links.
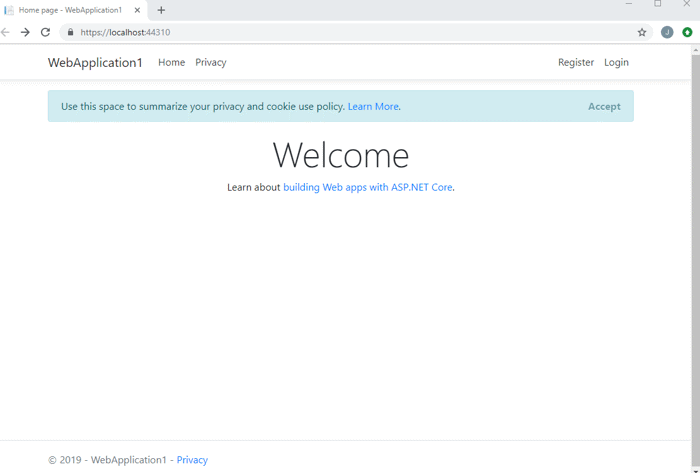
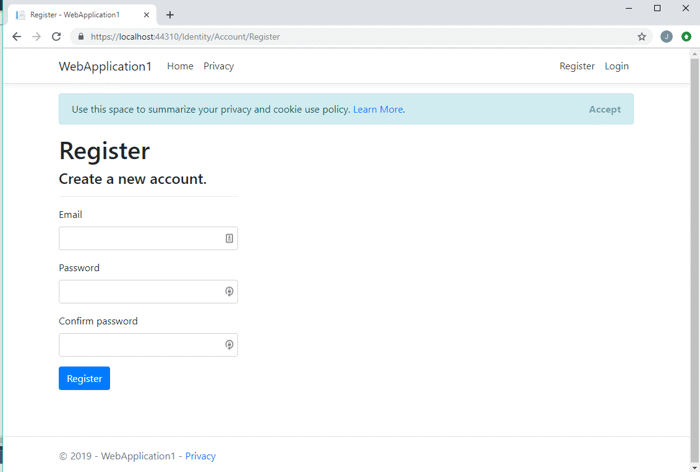
Clicking on the register link allows you to create a new account.
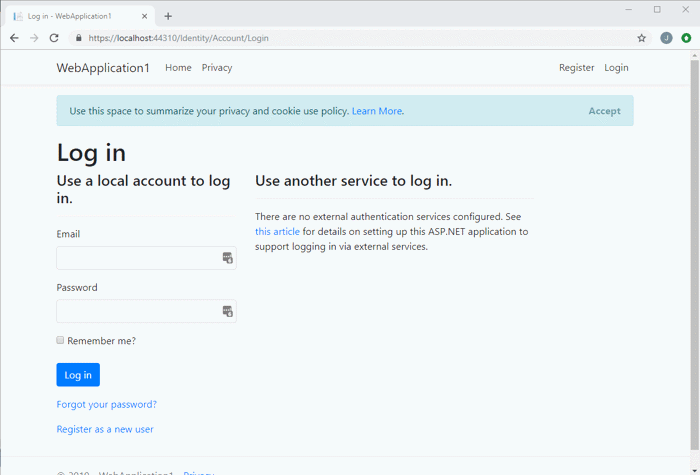
Clicking on the Login Page allows you to login.
As you can see, you get a lot of functionality out of the box from Identity with very little configuration required.
Customizing Identity
At this point, if you need more than what is provided by default, you can begin customizing the Identity pages and the schema. I’ve found the default schema is missing a couple of things I’d like to know about my users, such as when they registered and when they last logged in. In order to add and use those properties, you’ll have to override IdentityUser. The first step is to tell .NET you are doing that with a new class, PortalUser. In Startup.cs add the following code.
services.AddDefaultIdentity<PortalUser>()
                .AddRoles<IdentityRole>()
                .AddEntityFrameworkStores<ApplicationDbContext>();
What I’m doing is telling .NET that my custom class PortalUser is going to be used for Identity instead of the built-in IdentityUser. Note that I also must include AddRoles so Identity knows which roles to use and AddEntityFrameworkStores so it knows which DbContext to use. The order is very important here, AddRoles must come before AddEntityFrameworkStores. That point definitely tripped me up and you can see from my StackOverflow question by the number of views it has, that a lot of other people ran into the same issue.
Next, modify your ApplicationDbContext.cs to use PortalUser.
public partial class ApplicationDbContext : IdentityDbContext<PortalUser>
    {
        public ApplicationDbContext(DbContextOptions<ApplicationDbContext> options) : base(options)
        {

        }
    }
Then create the new PortalUser class with the properties you want to associate with your users and override IdentityUser
    public class PortalUser : IdentityUser
    {
        [PersonalData]
        public DateTime? LastLoginDateUtc { get; set; }

        [PersonalData]
        public DateTime? RegistrationDateUtc { get; set; }
    }
Then create the new PortalUser class with the properties you want to associate with your users and override IdentityUser
public class PortalUser : IdentityUser
    {
        [PersonalData]
        public DateTime? LastLoginDateUtc { get; set; }

        [PersonalData]
        public DateTime? RegistrationDateUtc { get; set; }
    }
Next, you’ll need to scaffold those changes using Entity Framework Code First.
add-migration -Context ApplicationDbContext identityAnd then save those changes to the database.
update-database -Context ApplicationDbContextFinally, you should see those columns in the user table in SQL Server.

In order to start using those properties, we’ll need to make changes to the Razor Pages that handle user login and registration. Find the login page code behind (Login.cshtml.cs) and edit it. To save the last login time all we have to do is set get the user account, set the LastLoginDateUtc to the current date and time, then update the user account. Note this is all done using Identity’s built in UserManager which lets us save changes to the UserStore which we have configured as our SQL Server database.
public async Task<IActionResult> OnPostAsync(string returnUrl = null)
        {
            returnUrl = returnUrl ?? Url.Content("~/");

            if (ModelState.IsValid)
            {
                // attempt a user login
                var result = await _signInManager.PasswordSignInAsync(Input.Email, Input.Password, Input.RememberMe, lockoutOnFailure: true);
                if (result.Succeeded)
                {
                    // get the user account
                    var user = await _userManager.FindByNameAsync(Input.Email);
                    if (user != null)
                    {
                        // save the last login time
                        user.LastLoginDateUtc = DateTime.UtcNow;
                        var resultSave = await _userManager.UpdateAsync(user);
                        if (!resultSave.Succeeded)
                        {
                            // log error
Conclusion
ASP.NET Core Identity provides a lot of functionality for managing your users with very little configuration required. Having the Identity UI provided as a library makes it really easy to get up and running. It also has great flexibility when you scaffold the Identity pages and extend it to meet the needs of your application. But as they say with great power comes great responsibility! This article just scratches the surface on what you can do with Identity so make sure you have a full understanding of ASP.NET Core security before you implement this in your application. I suggest checking out some great articles on Microsoft Docs below.
Further Reading
Overview of ASP.NET Core Security
Introduction to Identity on ASP.NET Core
Scaffold Identity in ASP.NET Core projects
Add, download, and delete custom user data to Identity in an ASP.NET Core project
Identity model customization in ASP.NET Core
Configure ASP.NET Core Identity

John HadzimaCore Contributor
John Hadzima is the Director of Application Solutions at Marathon Consulting. A graduate of Old Dominion University with a BSBA in Information Systems, he has been working as a developer in Hampton Roads for over 30 years with a focus on delivering solutions using the Microsoft Stack. When not coding, John enjoys surfing, skiing, biking, golfing, travel, and spending time with his 2 boys.