The Importance of Copyediting and Proofreading
February 27, 2024

Integrating Web App with Azure Active Directory B2C
Introduction to Azure ActiveDirectory B2C
Azure ActiveDirectory B2C (AAD B2C) is an identity management service provided by Microsoft within the Azure cloud platform. This service allows application developers to host the user store for their application in the Azure cloud. In practical terms, the effort involved in creating and managing users is offloaded to Microsoft, freeing the developer to focus on the primary functionality of the application.
There are many articles available online that explain the benefits of using AAD B2C. In this article, we’re going to provide a step-by-step guide to creating an Azure ActiveDirectory B2C user store and a new public-facing ASP.NET Core web application that utilizes the new user store. Our implementation of B2C will allow public users to create their own accounts within the store as well as provide a “forgot password” function.
Overview
Before we jump into the details of configuring AAD B2C, here’s a high-level description of the steps we’re going to follow:
- First, we’re assuming that you are familiar with Microsoft Azure and have an account.
- We’re going to create and configure an Azure ActiveDirectory B2C tenant.
- We’re going to define the “user flows.” User flows determine the user’s experience when they access certain areas of the application (e.g. creating an account, login, and password reset).
- We’re going to register a new application that will use the newly created AAD B2C user store.
- Finally, we’ll build an application that will use our AAD B2C as the user store.
Let’s Get Started
- Log in to your Azure account and enable Microsoft.AzureActiveDirectory as a resource in the subscription.
- Select the desired subscription, then select “Resource providers.”
- Verify that the Microsoft.AzureActiveDirectory is registered.
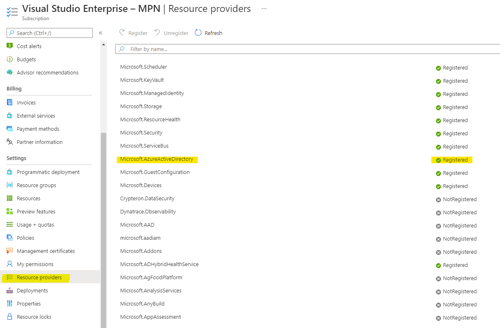
- If Microsoft.AzureActiveDirectory is not registered, select it and click “Register.”
- Create an AAD B2C tenant.
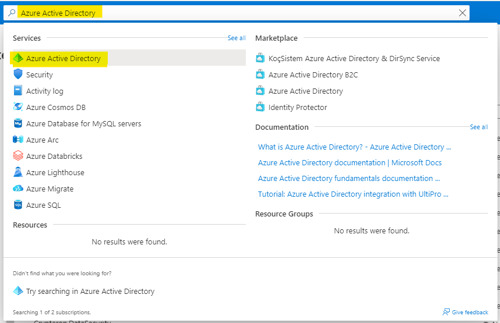
- In the Azure search bar, enter “Azure Active Directory” and select the Azure Active Directory service.
- In the Azure Active Directory blade, select “Manage tenants.”
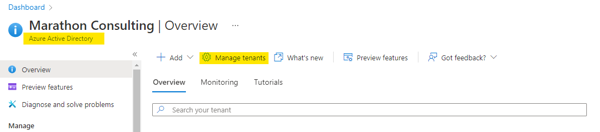
- Select “Create” to create a new tenant.

- In the create a tenant wizard, select “Azure Active Directory (B2C).”

- Provide the organization name, domain name, and resource group.
Remember the domain name, you'll need it later.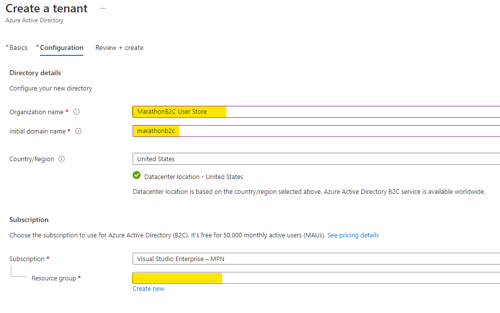
- Once the information has been provided, go to the next page and click “Create.”
- Once the tenant is created, switch to the new tenant by clicking on your account in the upper right of the portal, then selecting “Switch directory.”
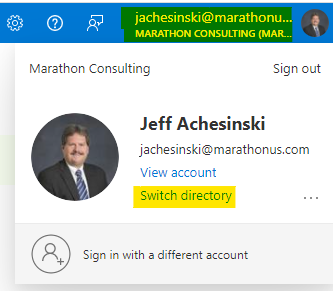
- Select the “All Directories” tab, find the new tenant in the list, and click the “Switch” button.

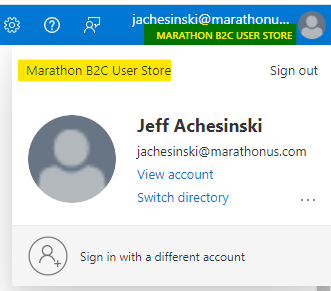
- Once you have successfully switched to the B2C tenant, your account information (click on your username in the upper right of the page) will reflect the change.
- In the Azure search bar, enter “Azure Active Directory” and select the Azure Active Directory service.
- Now we’re ready to create our “user flows.” User flows are the various account-related scenarios that a user may come across while interacting with your application.
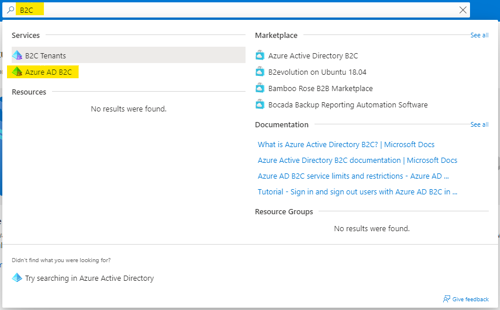
- In the Azure search bar, enter “B2C” and select the “Azure AD B2C” service.
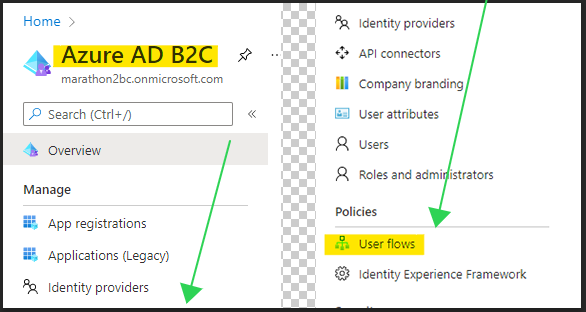
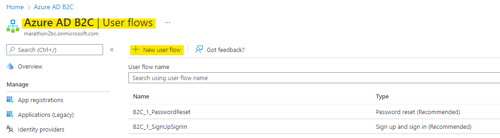
- In the B2C blade, select “User flows” from the navigation panel.
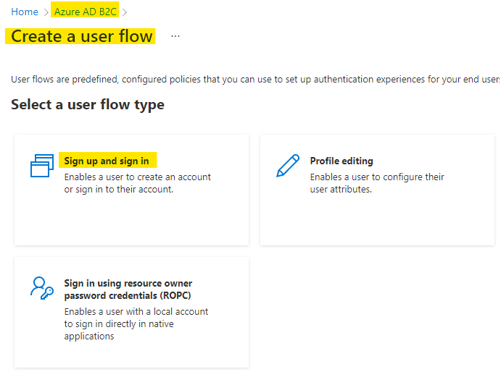
- Select “New user flow.”
- Select “Sign up and sign in.” This will create a user flow that allows users to create a new account within the user store or log in if they already have an account.
- Select the recommended version, then click “Create.”

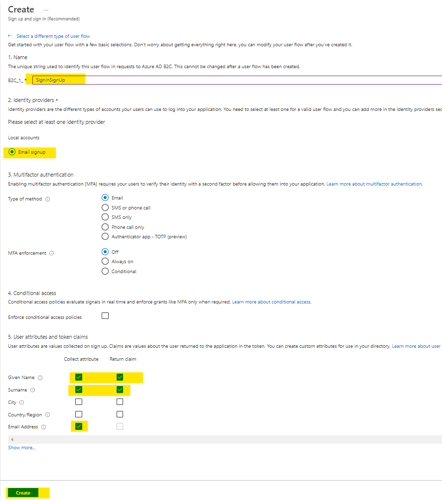
- Enter a name for the user flow, e.g. SignUpSignInFlow.
- Select “Email signup.”
- Leave multifactor authentication (MFA) disabled for this example.
- In the “User attributes and token claims” section, click “Given Name,” “Surname,” and “Email Address” in the collect attribute column.
- Note: more attributes are available by clicking “Show more...” at the bottom of the section.
- Click “Create.”
- Select the recommended version, then click “Create.”
- From the user flow blade, select “New user flow,” then select “Password reset.” This will create a user flow that allows a user to reset their password for the account.
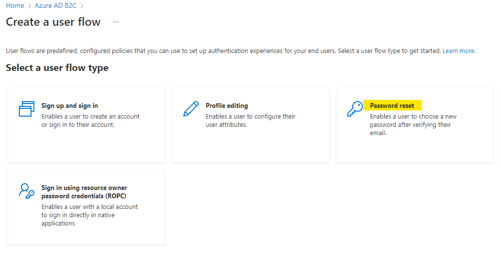
- Select the recommended version, then click “Create.”
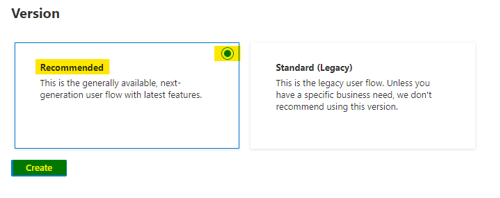
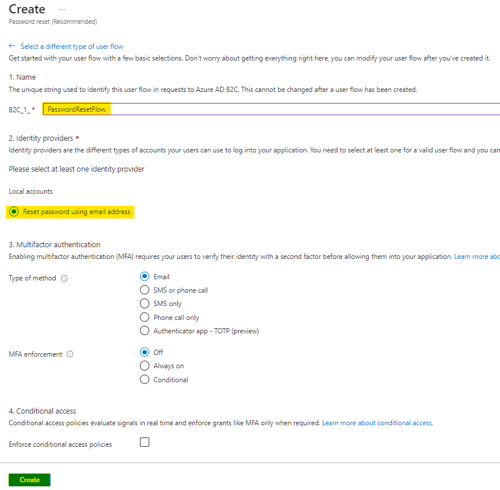
- Enter a name for the user flow (e.g. PasswordResetFlow).
- Select “Reset password using email address.”
- There are no claims needed (skip this section).
- Click “Create.”
- Select the recommended version, then click “Create.”
- In the Azure search bar, enter “B2C” and select the “Azure AD B2C” service.
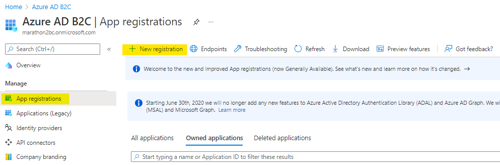
- Back on the main Azure AD B2C blade, select “App registrations” from the navigation menu, then select “New registration.”
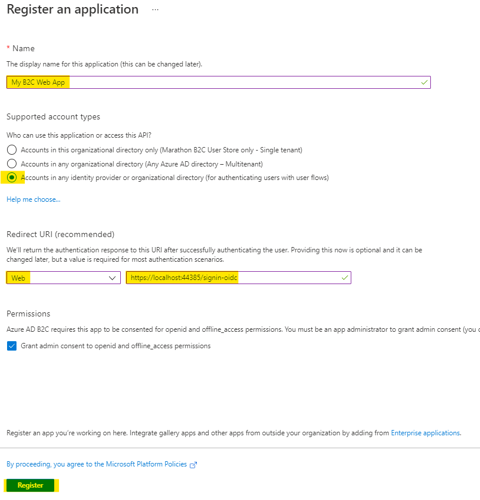
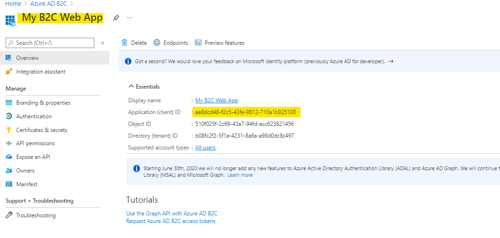
- Enter a name for the application (e.g. My B2C Web App).
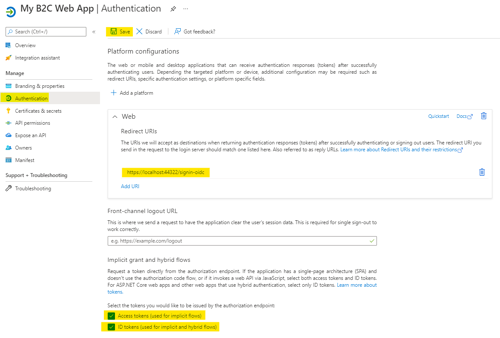
- In the Redirect URI section, enter “https://localhost:44385/signin-oidc” for the web option. Make a note of this value; we'll need it later. Your port number in the URI will probably be different. This will redirect back to the application after authentication is completed.
- Keep the default selection for all other options and click “Register.”
- Once the application is created, make of note of the application (client) ID; we'll need it below.
- Click on the “Authentication” option in navigation panel and check the “Access tokens” and “ID tokens” checkboxes. (This is also where you can edit the port number in the redirect URI if you need to change it).
- Click the save button at the top of the page.
- Now let's build the application.
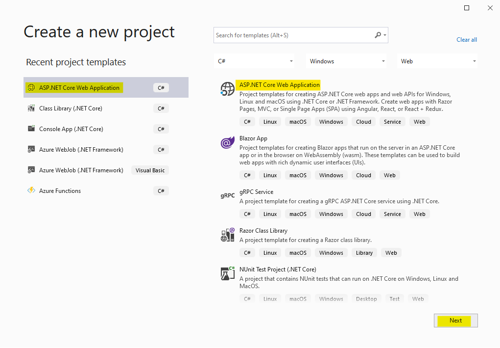
- Open Visual Studio and select “Create New Project.”
- Select “ASP.NET Core Web Application” and click “Next.”
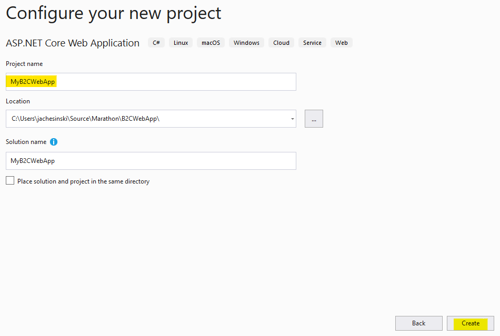
- Name the application (e.g. MyB2CWebApp) and click “Create.”
- In the Create ASP.NET Core web application wizard, select “Web Application (Model-View-Controller).”
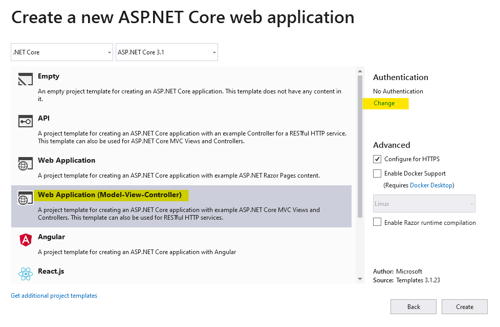
- Click “Change” in the authentication area. This is where everything comes together.
- Select “Individual User Accounts.”
- Select “Connect to an existing user store in the cloud” from the dropdown.
- Complete the remaining information as follows:
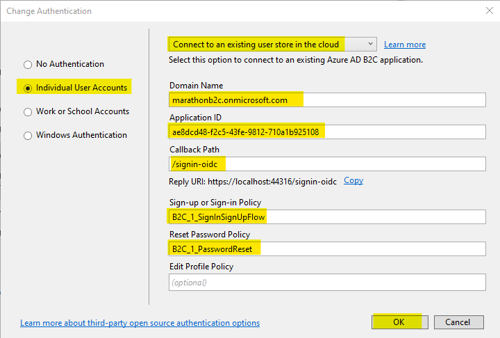
- DomainName ? {your_b2c_domain_name}.onmicrosoft.com
- Application Id ? {your application id}
- /callbackPath ? {your callback uri} (e.g. /signin-oidc)
- SignInSignUp Policy ? B2C_1_{your_signup_signin_name}
- PasswordReset Policy ? B2C_1_{your_password_reset_name}
- Click “OK” to save your authentication settings.
- Click “Create” to create your web application.
- Run the application.
- Run the application as is. The default application will build and run without any authentication.
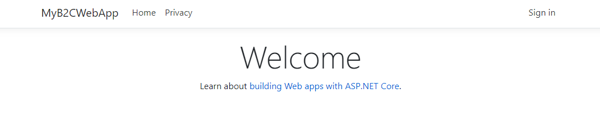
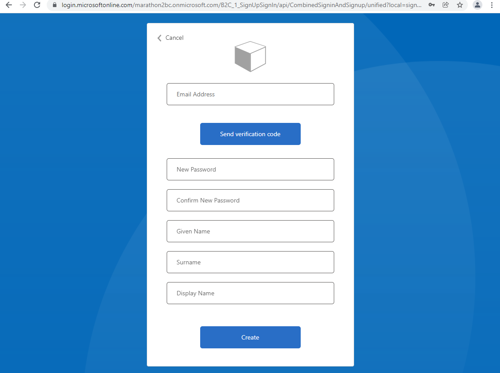
- Click “Sign in” in the upper right to create your account. Notice the application moves to login.microsoftonline.com.
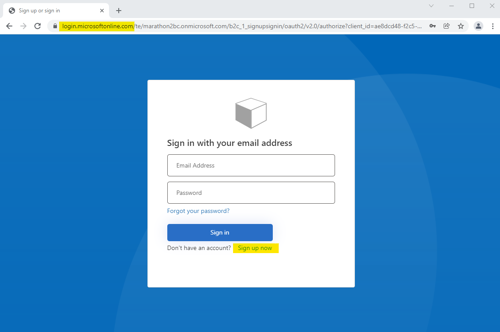
- Provide the data to verify and create your account.
- Once you’ve created your account and logged into the application, the upper right will change to indicate that you’ve successfully logged in.

At this point, we’re successfully connected to the new AAD B2C user store, but our application isn’t secure yet.
- Run the application as is. The default application will build and run without any authentication.
- Secure the application.
It's up to the developer to decide and apply the proper authentication where it is needed. There are several ways to apply authentication/authorization within the app.
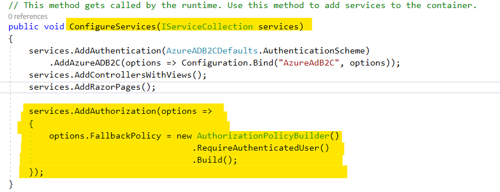
However, here's a brief code snippet to apply authentication to all the pages within the app.
In the ConfigureServices method in the Startup.cs file, add the highlighted code.
After adding the code, run the application again. You should go directly to the login page (on microsoftonline.com) before your application is even displayed in the browser.
Provide your credentials and you should be redirected back to the home page of the application.
- Congratulations – you've created an ASP.NET Core web application that is secured with an Azure ActiveDirectory B2C user store.
There are many, many customizable options when using the B2C, but they are beyond the scope of this article. I hope this article has helped you understand the basic components used by AAD B2C and how to integrate AAD B2C into your application.
Happy coding!

Jeff AchesinskiCore Contributor
Senior IT Consultant
Jeff Achesinski is a Solution Architect at Marathon Consulting and a Microsoft Certified Solutions Developer (MCSD). He has been working as a software developer in Virginia Beach for over 30 years. Jeff also spent 15 years as a volunteer scuba diver at the Virginia Aquarium and served on the Board of Directors for Kempsville Volunteer Rescue Squad. He lives in Virginia Beach with his wife, April.